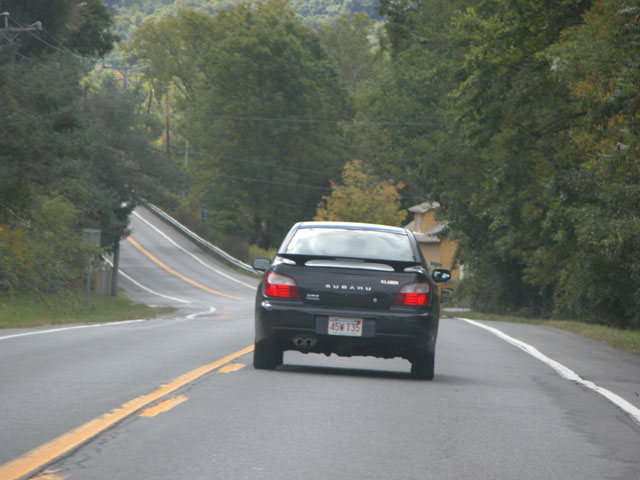
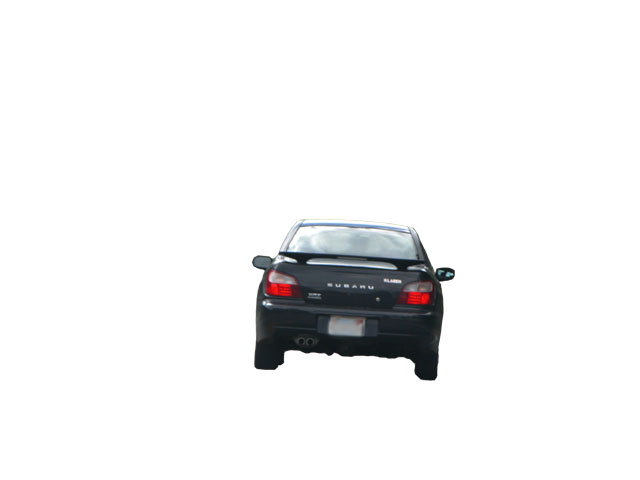
It started when my wife and I were following my brother to his place from a wedding. After looking through some photos I got bored and snapped some shots of his car. As you can see, not the most exciting picture in the world.
But what if I could make it into the most exciting picture in the world? With the power of Photoshop, anything is possible.
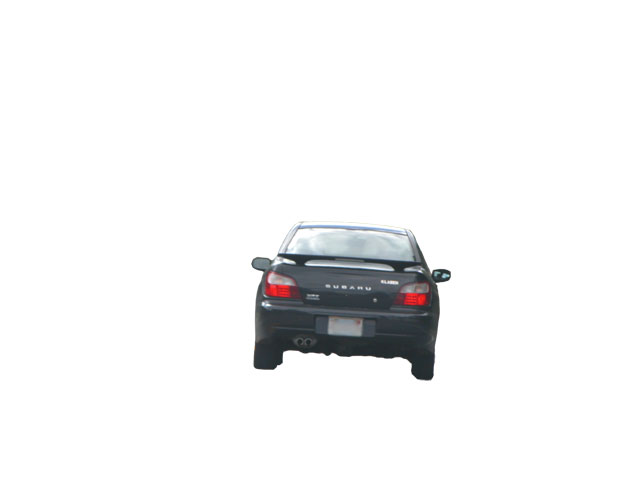
First, I cut the car out of the picture. The trick to doing this is using the Magnetic Lasso Tool to make the rough selection and then adding and/or subtracting with the polygonal lasso to clean things up. Once you’ve got a good selection, copy and paste the car (it will be a new layer).
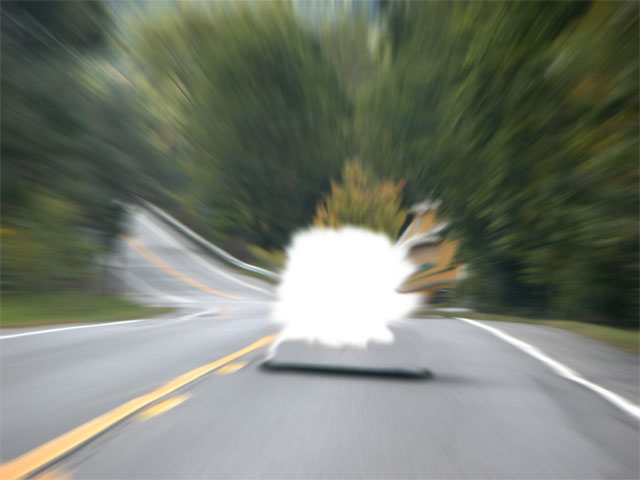
The next picture shows the background with the car cut out. It helps to expand the selection by a pixel or two before deleting in order to make sure you’ve cleared out the fringes of the car.
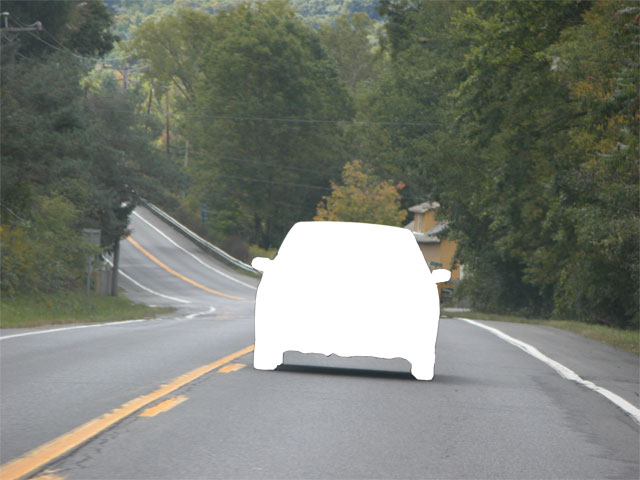
Now we’ll want to make sure we have some background behind the car so that there’s no visible gap or fringe. Here I used the Smudge Tool to drag the background image in. It’s important to try to keep straight lines straight. I didn’t do a very good job with the house, but the road is good. You’ll see why you need to smudge it this much soon.

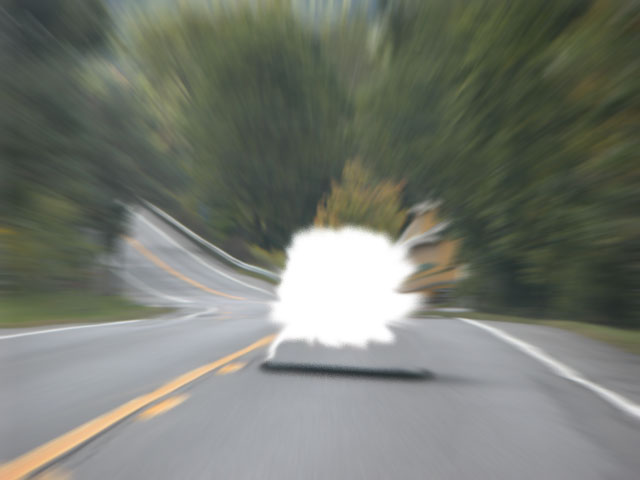
Now we do the real magic – under filters, you should find Radial Blur. Center the blur on your object of interest (in this case, the car) and play around with the blur amount. In this case the amount was 20. Make sure you choose Zoom and the blur method.
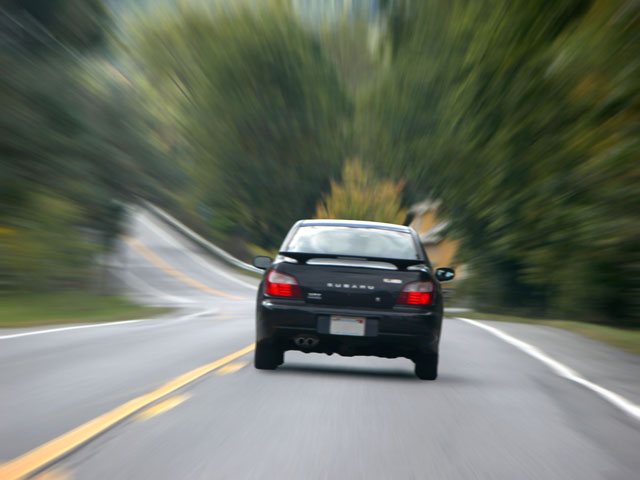
Now we go back to the car. You might want to enlarge the object just a little bit and for this photo I tweaked the contrast and levels to compensate for the poor lighting in the original.
The car looks good, but what about that background? Tweak the levels and contrast on the background until it looks, well, dynamic and exciting. You might want to bump up the saturation as well and maybe go a little farther than you normally would to make things dramatic.
Finally, I decided to add a little side-to-side motion blur to the car to make it clear that it was following the curve in the road. I’m not sure this is entirely successful, feel free to skip this step.

Here we have the finished product. Look at it side-by-side with the original to see how far we’ve come.
I would love to read this article in its entirety, but after “Radial Blur”, I can’t keep the image on the screen for long enough to read the text. Honestly, I am still dizzy from the image.
I appreciate the step-by-step instructions for the rest of us.
hey mate! thats an amazing effect, made as simple as possible!
great effort i should say..
cheers
Wow that’s great